Create a new event or admission
In this article
- Differences briefly explained
- Create event/admission
- Title
- Event start date
- Publish
- On the start page in the ticket shop
- Categories
- Description in online shop
- Description on the ticket
- Image
- Quota
- Validity
- Ticket types
- Hiding ticket typs in the online shop
- Ticket printout
- Hide price on ticket
- Individual description on the ticket
- Individual image on the ticket
- Individual background image on printed ticket
- Check-ins
- Check-in waiting time
- Min./Max. number of tickets per ticket type
- Number of people per ticket
- Sales start and end
- Add-ons
- Tags per ticket type
- Add, copy and delete ticket types
- VAT
- Advanced Settings
- Min/Max. Number of tickets per order in the online shop
- External organiser
- Organiser and venue
- Order notification
- Send attendance list automatically
- Availability notification
- Customer comments
- Personalised tickets with questions
- Background graphics for printed tickets
- Description on the ticket per ticket type
- Individual legal notice on outprint
- Own confirmation email
- Attach PDF to confirmation email
- No tickets for download
- Restrict check-in
- External sales location
- Customer data in the online shop
- Hide date for events
- Postpone or cancel
- Tags per event / admission
- Copy event
Differences briefly explained
Events
- Events can be created as a normal event or with a hall plan.
- Event tickets are valid on a specific date.
- The name of the purchaser is printed on the ticket layout.
- Events can be created with a quota.
Overview page Events
In the menu of the e-guma Ticketing System, go to Events -> Edit to open the event overview page. In the left-ahand drop down, switch between all current and all past events and admissions.

Admissions
- Admissions can be created as normal admission or with calendar
- Admission tickets are issued without date by default, they are valid in e-guma on any day. If the admission is created with calendar, the tickets are provided with the validity date.
- By default, the name of the purchaser is not displayed for admission tickets. Here you will learn how to insert the name in the description text on the ticket.
- By default, no quota is stored for admission tickets. As long as an admission ticket is published, it can be purchased. If the admission is created with calendar, quotas can be deposited.
Overview page Admissions

Creating a new event/admission
Title
Ensure that the event/admissions has a Title in your selected language (learn here how to add or remove a new language).
Event start date
This function applies only to events, not to admissions.
Specify the Date and Time for the event. If you enter 00:00 or 23:59 as the time, the time will be hidden, both in the printed ticket and in the online shop.
As soon as tickets for the event are issued, the date cannot be amended by default. If you nevertheless want to change the date, click on the link Change Anyway?

Publish
Publish the event or admission here and activate the desired sales channels.

On site
You can issue tickets for the event or admission via the e-guma back office.
Online shop
You can sell tickets for the event or admission via your online shop.
Hidden in the online shop
You have the option to hide the event/admission in the online shop. Using the direct URL in the toolbar, you can Open in Online Shop and send it to your target group.
Adjust sales closing time
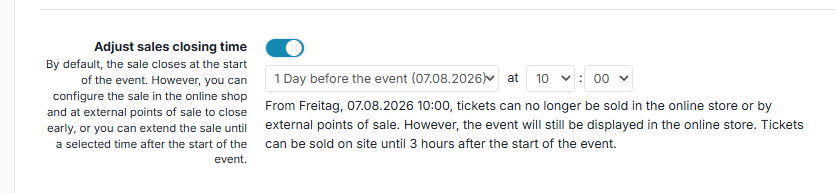
Control the sales closing time for the online shop and external sales channels here. Specify the number of days before the event as well as the exact time. Once online ticket sales are closed, the event will still be listed, but tickets can no longer be purchased. On-site sales remain available until 3 hours after the event starts. With the options On the day of the event and 1 day after the event, you can allow tickets to be purchased even after the event has started.

Box office only
If Box office is enabled, clicking on the event in the ticket shop displays the message: "Online ticketing is closed. Tickets are still available at the box office."

On the start page in the ticket shop
This function is activated by default. If you assign the admission to a category, you can determine whether you want to remove the admission from the start page in the ticket shop. Learn more.

Categories
Learn how to create categories in the online shop:
-> Events
-> Admissions

Description in online shop
Give the event/admission a suitable description for the online shop. Learn here how to incorporate Google Maps into your description.

Number of participants {{CurrentCountAttendees}}
Contingent {{MaxCountAttendees}}


Description on the ticket
Give the event/admission a suitable description for the printed ticket.

- {{order_date}} - order date
- {{note}} - remark or comment of your clients
- {{first_name}} - first name (from the order or if in use, from questions per ticket)
- {{last_name}} - last name (from the order or if in use, from questions per ticket)
- {{company}} - company (from the order or if in use, from questions per ticket)
- {{start_date_and_time}} - start date and start time of the ticket
- {{start_date}} - start date of the ticket
- {{start_time}} - start time of the ticket
- {{ticket_type_name}} - ticket type
- {{valid_until}} - validity of the ticket, if in use
- {{order_lines}} - list of tickets of the order
- {{greeting}} - greeting
- {{dear}} - salutation
- {{skidata_permission_serial_number}} - Permission Serial Number from Skidata
Image
Select a suitable picture for the event/admission (at least 800 pixels wide). This graphic will be used in the online shop and on the printed ticket.

Quota
This function applies only to events, not to admissions.
Learn here how to set up quotas.
Ticket types
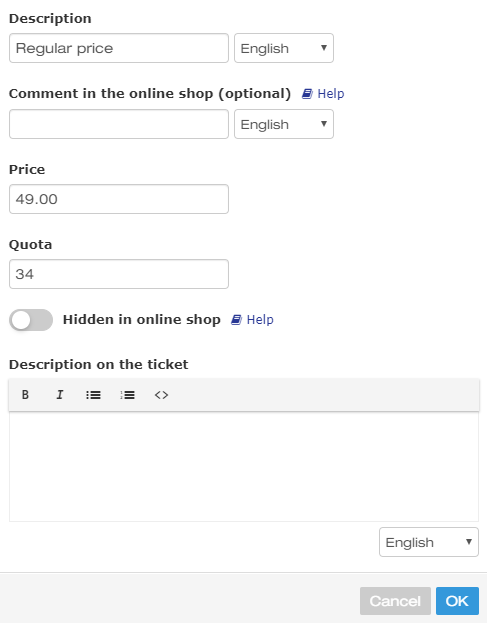
Click on the blue button Add ticket in order to create more ticket types.

Assign a description and a price by clicking on the pen-symbol.
 The hint is an optional field which is visible below the title. The hint is not displayed on the purchased ticket.

Hiding ticket types in the online shop
If you would like to sell one or more ticket types only locally, activate the function Hidden in online shop.

This function also allows you to release hidden ticket types by using a promo code in the online shop. Learn more.
Ticket printout
Click on Ticket printout, to make further adjustments to the printed version of the ticket.

Hide price on ticket
Check this box if you want to hide the price on the ticket for the selected ticket variant. Here we show you how you can hide the price on the ticket in retrospect for an already issued ticket order.
Individual description on the ticket
Would you like an to insert an different description for each ticket type? Then enable this feature and add a description. If you do not enter any description, the description you entered here will be used by default.

Individual image on the ticket
Would you like to display a custom image for each ticket variant on the ticket? Activate this feature and upload a custom image.
Individual background image on printed ticket
Would you like an to insert an different background image for the text area on the printed ticket for each ticket type? Then enable this feature and upload an individual image.

Check-ins
Click on the tab Check-in, in order to enter the the number of times a ticket can be checked-in and validated. Normally a ticket is checked only once. At bigger events it may happen that one ticket needs to be validated at several check-in points. If so, adjust the amount of check-ins accordingly. You can find more information on check-in positions in this article.

Check-in waiting time
For the options Multiple Check-ins and Unlimited Check-ins, you can define a waiting period in minutes, hours, or for the rest of the day before the same ticket can be checked in again.

Extended
Click on Extended, to make further adjustments to the ticket type.
Min./Max. number of tickets per ticket type

Number of people per ticket
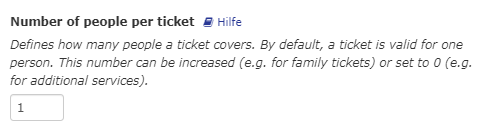
This function only applies to events with the contingent variants Contingent for Event and Quota Pools. This function is not supported for the contingent variant Contingent for ticket types or for events with a seating plan.
Sales start and end
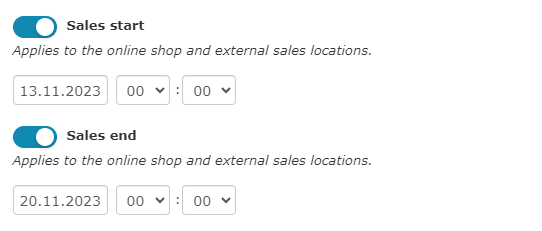
In order to quickly see in which period the ticket variants are available, the switch-on and switch-off date is displayed in the list of ticket variants.

Add-ons
This article explains how to sell add-ons per ticket using ticket questions.
Tags per ticket type
Add tags if you want to categorise the ticket types for internal purposes or data exchange via interface.

| Tag | Function |
Hide-for-external-sales-locations |
This tag ensures that the ticket type does not appear at external sales locations. |
Older-than-16 |
Purchasers of this ticket type must be at least 16 years old. The age may vary. |
Younger-than-16 |
Purchasers of this ticket type must be younger than 16 years old. The age may vary. |
Calendar-n-orders-per-slot |
This tag defines that only one order per slot is possible for a ticket type. |
Online-shop-activate-invoice |
This tag makes the invoice available for this ticket type. The invoice must be active in the ticket system settings. |
Only-even-quantity |
This tag can be used to specify at ticket variant level that only an even number of tickets can be purchased. This tag is currently only supported in the online shop for normal events. |
Ticket-hide-event-location |
With a tag per ticket variant, the location (venue including address, postal code, city, and country) is hidden on the PDF ticket and, if applicable, in the Wallet Pass. |
No-ticket |
With this tag, a ticket option can be configured so that no tickets are made available for download. |
Exclude-from-event-availability |
e-guma excludes ticket variants with this tag from the availability calculation. This availability is applied throughout the entire system (shop, dashboard, API, etc.). |
Exclude-from-attendance-liste |
e-guma excludes ticket types with this tag from the attendance liste. |
Ignore-promocode-ticket-pass |
No ticket pass with promo code will be created for these ticket types. |
Exclude-from-email-campaigns |
Ticket variants with this tag are excluded when sending messages to participants. This applies to both automated messages and manual messages to participants. |
Add, copy and delete ticket types
You can activate or deactivate, edit, copy or delete individual ticket types at any time. You can also change the order of the individual variants by using the symbols below

VAT
Select the correct VAT rate for the event/admission.

VAT Splitting

Now you can enter the appropriate VAT rate for the individual ticket types.

If a ticket type contains several VAT rates, select up to three VAT rates. Now define the amount and the VAT rate for each share.

Advanced Settings
Min/Max. Number of tickets per order in the online shop
You can optionally specify a minimum and/or maximum number of tickets per order in the online shop.
External organiser
Activate the field External organiser if the event is organised by an external organiser. In this case, the VAT number and the name of the external organiser must be listed on the receipt/invoice.

Organiser and venue
With the Organiser and Venue options, you can adapt the standard details to suit the particular event/admission.
Order notification
Learn here how you can be notified in the event that a new order is placed or a cancellation is made.

Send attendance list automatically
Find out here how to set whether and when a list of participants is automatically sent by e-mail before the event or a calendar slot.
Availability notification
Find out here how you can be notified as soon as your event is fully booked or availability falls below a certain limit.
Customer comments field
You can optionally configure your system so that your customers can enter individual Comments when buying a ticket. Learn more about Comments here.
Personalised tickets with questions
Background graphics for printed tickets
You have the option of configuring an Image on printed ticket in the lower portion of the ticket layout. The graphic should measure 720 pixels × 630 pixels. View an example of a background picture on the ticket layout here.
You can preview any text or image changes on the printed ticket using the blue button Ticket Preview) as well as the online shop (Shop button in the header) so that you are sure that everything looks the way it's supposed to.
Description on the ticket per ticket type
If you require a different description on the ticket printout for each ticket type, you can activate this function here.

The description field on the ticket will be deactivated automatically.
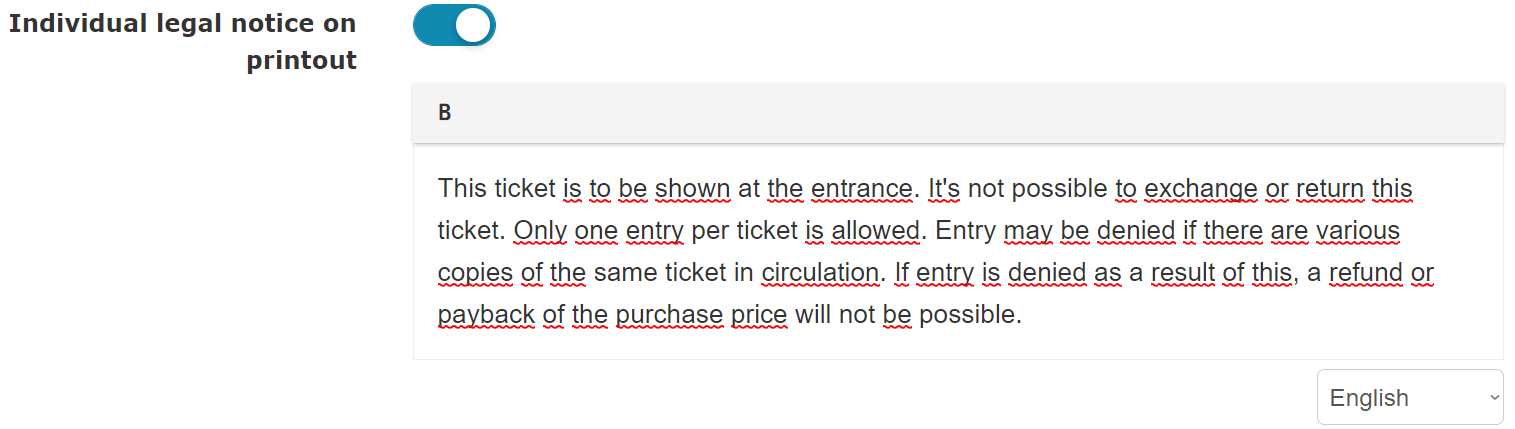
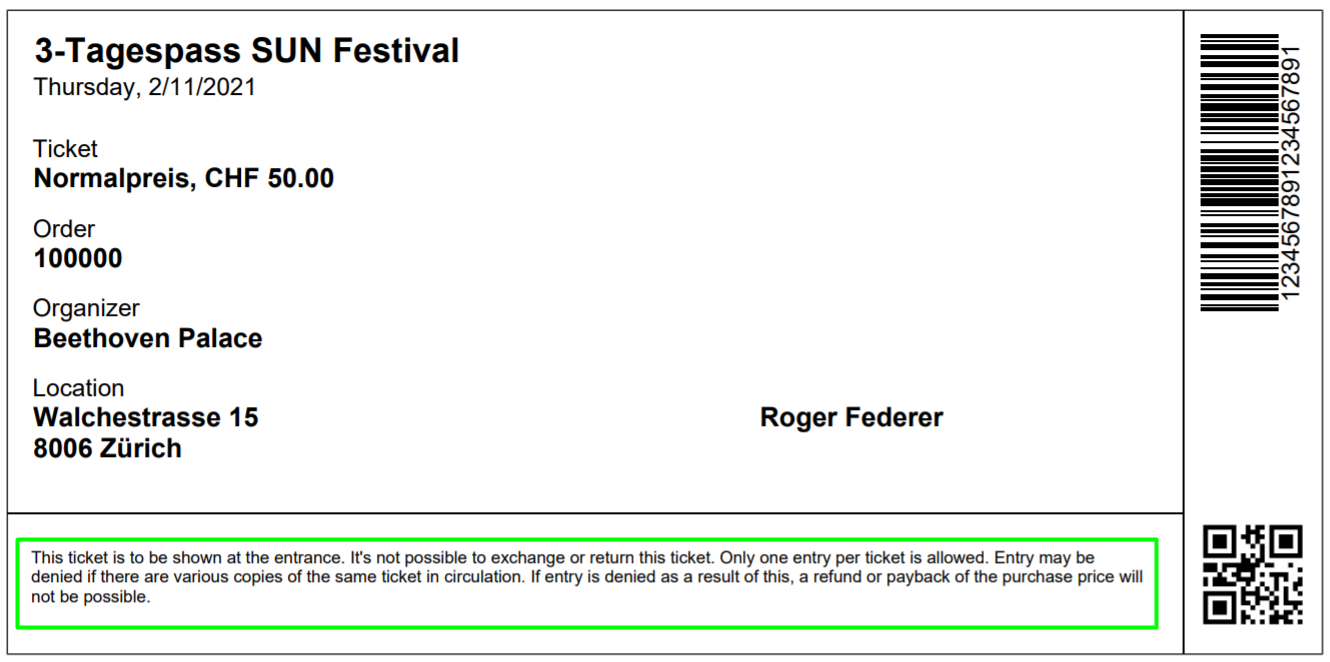
Individual legal notice on printout
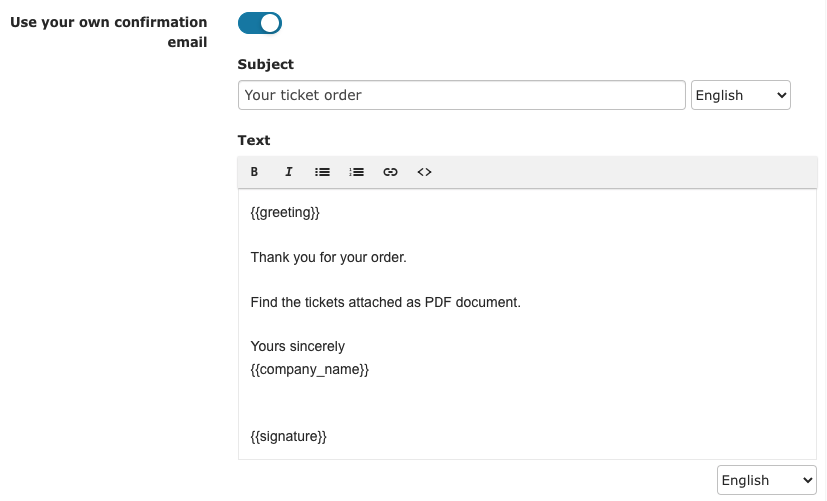
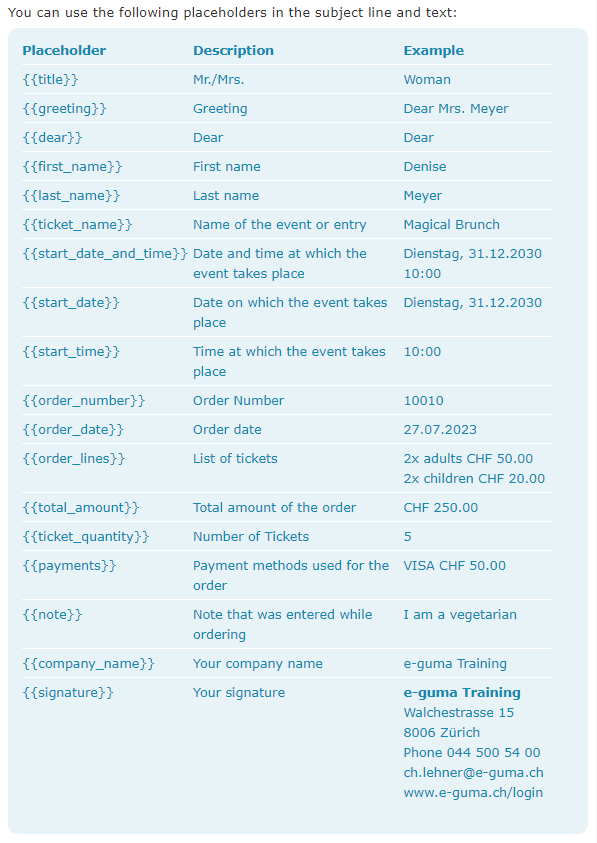
Own confirmation email
Attach PDF to confirmation email

No tickets for download
- no ticket PDF is provided.
- the description field on the ticket and the background graphics for printed tickets are hidden.
- there is no ticket preview available.
Restrict check-in
Configure under Check-in per event or entry which users are allowed to check in tickets.

By default, the option All users is selected. Alternatively, you can select Selected users who are allowed to check in tickets or individual users who are not allowed to check in tickets. Only users with check-in or full access rights will be listed.
When checking in a ticket via the Ticket App, Web Check-in, or API, the system verifies whether the user is authorized to perform the check-in. If a user attempts to check in an event/entry for which they are not authorized, a corresponding message will be displayed.
External sales location
Activate this function if you want only certain external points of sale to be authorised to issue tickets for this event/entry:

Customer data in the online shop
You can specify for each event or admission whether the complete or reduced check-out form is displayed in the online shop:

Hide date for events
Activate this option if you want to hide the event date in e-guma. The date will be hidden in all relevant places, e.g. in the online shop during the entire order process, on the ticket, in the confirmation email, in the dashboard or in the order management, etc. This function is particularly suitable for tickets that are valid for several days, e.g. subscriptions for several events with a seating plan. This function is particularly suitable for tickets that are valid over several days, e.g. subscriptions for multiple event passes with a seating plan.

In an event category grouped by date, the events with the date hidden appear at the top.

Postpone or cancel
All information about postponing or canceling an event can be found in the support article FAQ - Postpone or cancel events.
Tags per event / admission
Add or create a tag if you want to categorise the events or entries for internal purposes or data exchange via the interface.

| Tag | Function |
Ticket-hide-customer |
This tag hides the name of the ticket holder on the ticket. |
Ticket-large-qr-code-only |
This tag hides the barcode and displays the QR code larger under the ticket section. |
Online-shop-deactivate-invoice |
This tag deactivates the invoice for the event/entry. |
Online-shop-deactivate-online-payments |
This tag deactivates online payment for the event/entry.
|
Ticket-address-required |
This tag requires the address for each personalized Skidata ticket. |
Ticket-email-required |
This tag requires the email address for each personalized Skidata ticket.
|
Ticket-phone-required |
This tag requires the phone number for each personalized Skidata ticket.
|
Backoffice-require-phone |
If a phone number should be recorded when creating an entry, this tag can be added to the entry. |
Seat-label-table-only |
This tag displays only the table designation (e.g., Table 1) and no seat designation for tickets with seating plans.
|
Online-shop-require-zip |
This tag requires the postal code if the short form is activated.
|
Online-shop-require-city |
This tag requires the city if the short form is activated.
|
Online-shop-require-phone |
This tag requires the phone number for checkout.
|
Online-shop-require-country |
This tag requires the country if the short form is activated.
|
Online-shop-show-company-address-field |
This tag shows the company field if the short form is activated.
|
Online-shop-hide-company-address-field |
This tag hides address fields if the regular customer form is activated.
|
Online-shop-activate-invoice |
This tag makes the invoice available for this event/entry. The invoice must be active in the ticket system settings.
|
Onlineshop-deactivate-voucher-redemption |
This tag prevents vouchers from being used as a payment method for this event in the ticket online shop.
|
Onlineshop-deactivate-organisation-voucher-redemption |
This tag prevents organization vouchers from being used as a payment method for this event in the ticket online shop.
|
Backoffice-allow-7-days-in-the-past-to-issue-tickets |
With this tag, tickets can be issued in the back office for entries with a calendar for dates up to 7 days in the past. |
Only-send-order-notification-for-postal-delivery |
As soon as the tag has been stored with Skidata for an entry, the order notification will only be sent for a new order if at least one ticket has been ordered using the postal delivery medium. |
Ticket-allowed-zip-codes-1234-5678 |
This tag allows defining the permitted postal codes for personalized SKIDATA tickets. |
Onlineshop-allowed-zip-codes-1234-5678 |
This tag allows defining the permitted postal codes for checkout. |
Ticket-contact-search-deactivate |
This tag allows the contact matching for personalized SKIDATA entries to be deactivated. |
Notification-email-add-tickets |
This tag allows tickets to be added as attachments to order notifications. |
Ticket-delivery-postal |
This tag ensures that no tickets are delivered to the buyer in the online shop. Instead, the tickets are available in the back office with the orders, where they can be downloaded and sent. |
Only-send-order-notification-when-ordering-online |
This tag controls that an order notification is only sent when tickets are purchased online. |
List-at-the-top |
This tag can be used to ensure that the event is displayed at the very top of the list. Currently, the tag only works if the event is listed in a category. |
Ticket-show-customer-name |
This tag allows the customer's name to be displayed on an admission ticket. |
Ticket-zip-required |
This tag specifies that, for a personalized ticket with SKIDATA, the postal code is required. |
Ticket-date-of-birth-deactivated |
This tag specifies that, for a personalized ticket with SKIDATA, the date of birth is not required. If this tag is set, the Contact Search is automatically deactivated. |
Checkin-ignore-expire-date
|
This tag allows admission tickets to be checked in even after their validity has expired. |
Sort-?? |
This tag allows sorting of events that are created for the same date and time. For example, the first event can be assigned the tag Sort-1 and the second Sort-2. This custom sorting is supported in the online shop on the category detail page. |
Checkin-completed-send-notification-to:??? |
This tag allows you to configure an email notification that is automatically sent as soon as a ticket is fully checked in. It works for the check-in strategies: Single Check-in, Multiple Check-ins, and Check-in Positions. The recipient address can be integrated directly into the tag. |
Ticket-hide-barcode |
With the new tag, the barcode on the ticket can be hidden for an event/admission. |
Onlineshop-show-slots-only-ahead-??-weeks |
For an admission with a calendar, it can be defined that in the online shop the slots are only displayed a certain number of weeks in advance. This restriction does not apply to on-site sales. Slots are displayed including the day that corresponds to the specified number of weeks, e.g., if it is Friday and the tag Onlineshop-show-slots-only-ahead-1-weeks is set, slots will be displayed up to and including the next Friday. If the tag is used with 0 weeks, no slots are displayed. This way, slots can already be set up without being published. |
Calendar-apply-validity |
If this tag is added to entries with daily slots, the start/end date of the slot(s) (if multiple slots can be booked) will be stored as the validity period. As a result, the tickets can only be checked in during the validity period, and the validity period is visible on the ticket. |
Calendar-use-promocode-ticket-pass-validity-for-date-selection |
When the promo code of the pass is used for a booking with a calendar entry, this day can be added to the calendar entry. e-guma ensures that only slots are displayed which do not exceed the expiration date of the ticket pass. This requires that a validity period is defined for the ticket pass and/or the calendar entry. |
Backoffice-email-not-required |
With this tag, it can be configured at the event / admission level that the email address is not mandatory. This applies to events where the email address and phone number are required by default, as well as to admissions with a calendar where the email address is required. |
Backoffice-phone-not-required |
With this tag, it can be configured at the event / admission level that the phone number is not mandatory. This applies to events where the email address and phone number are required by default. |
Check-in-allow-reentry-on-the-same-day |
With this tag, after the first check-in, any further check-ins on the same day are not recorded in the check-in report and do not reduce the number of available check-ins for tickets with multiple check-ins (e.g. 10-entry pass). |
Ticket-use-customer-image-on-pdf |
If this tag is present for an event/admission, the photo uploaded per ticket will be displayed as a thumbnail on the corresponding PDF ticket when a ticket is issued on site or in the online shop. If the photo per ticket is optional and no photo is uploaded, the standard image will continue to be used. |
Short-ticket-number |
With this setting, the ticket number for an event/admission can be configured to contain eight characters (digits). This can be useful, for example, if the number is intended to be used for additional purposes. |
Copy event
Would you like to create the same event on a different date? This can be done using the blue Copy button: the event only needs to be created from scratch one, and can then be copied and updated with new details. Using the Copy function, all settings such as price levels, ticket types, quotas, etc. will automatically be carried over.
If you work with categories: Before copying the event, ensure that you have assigned the desired category so that the category is also carried over when copying. Otherwise, you would need to repeat this step manually for all events.