Issuing vouchers locally - Overview
In this article, we provide a step-by-step guide to selling vouchers locally using cash or card as the payment method
In this article
Payment methods
This article applies to the following payment methods:
| Cash |
| Maestro |
| Credit cards (MasterCard, Visa, AmEx, etc.) |
| PostFinance Card |
| WIR |
| REKA |
The following payment methods are described in separate support articles:
| Invoice
|
| Complimentary
|
| Pro forma
|
| Payment after validation
|
Creating a voucher order
- 1
- In the menu of the e-guma voucher system, select Vouchers -> Sell.
- 2
-
Select the desired voucher types (you can see how to issue an individual voucher here).
- 3
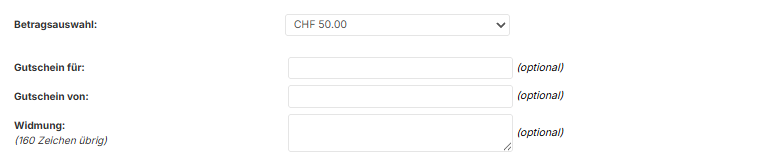
-
Select the desired service in the drop-down menu (if the voucher is available in multiple variants) and, if desired, customise the voucher by filling in the "Voucher for," "Voucher from," and "Message" fields.
- 4
-
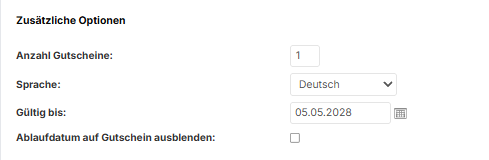
The Extra options allow you to define the number of vouchers, the language and the expiry date (as an option you can select whether to show the expiry date on the voucher).
- 5
-
Click on the button to place the item into the shopping cart.
- 6
-
Repeat this step as necessary by using the Add further vouchers button.
- 7
-
Once you have created all your vouchers, click on the Proceed to checkout button to be taken to the order.
- 8
-
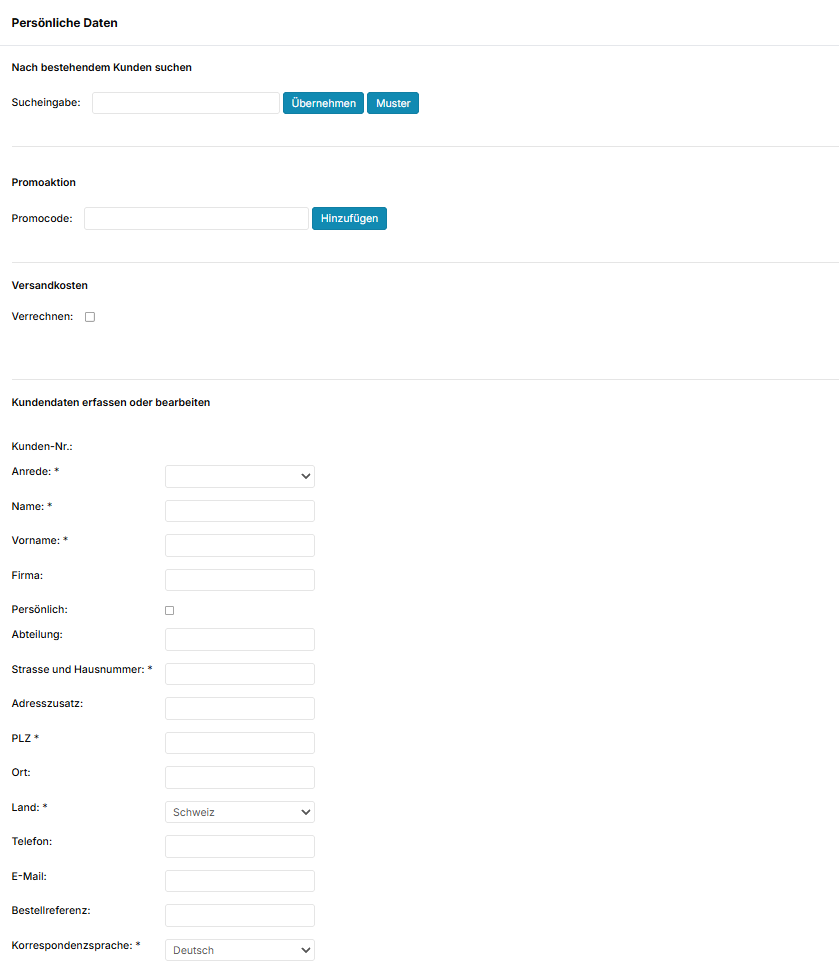
If the customer has previously purchased a voucher, you can search for the customer's address, then select it and click on Apply. If the address is not present, enter the details ( ideal for marketing purposes). If the address is not known or if you are issuing a complimentary voucher, e.g., for a raffle, click on the top right button with your company details. Then click on Continue.
- 9
-
Select one or more payment methods. Then click on Continue.
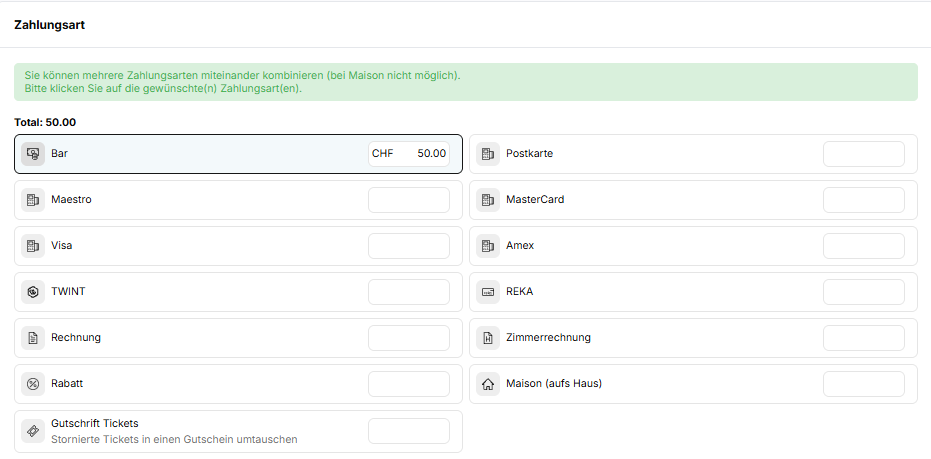
-
The payment method is selected for information purposes so that the end-of-day sales report will show the correct balances for each payment method. For your customer's actual payment, you will use one of the standard payment methods that you offer locally, e.g., your credit card terminal.
The "Complimentary" payment method only appears if you have the appropriate permissions. - 10
-
At the end of the process, you'll see an overview of your order. If everything is correct, you can complete the order by clicking on Order.
- 11
-
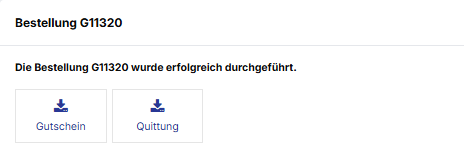
You can now download the voucher PDF and the invoice for printing and to be handed to the customer if required.
- 12
- As a final step, you must enter the sold voucher and the payment received for it in your cash register or PMS (in the same way as you would have handled voucher sales before using e-guma).


Manage Vouchers and Orders
In the menu of the e-guma voucher system, select Vouchers -> Orders. The order you have just issued will appear in the order management. You can find all details about the order, cancellation options, and the receipt on the Order detail page.
Information about the voucher as well as the voucher PDF can be found in the Voucher management or by clicking on the corresponding voucher code on the order detail page. If you discover an error on the voucher only after printing it, you can always correct it here.