Creating an admission with calendar
In this article you find out how to create an admission with calendar.
In this article
Creating an admission with calendar
This article contains only those functions specific to the Admission with calendar. For all other input fields, please consult the Creating an event or admission article.
In the menu of your ticketing system, click on Admissions -> Edit. Then click on the blue Add -> With calendar button to the right.

Full-day admissions
Specify whether or not your admission is a full-day admission or has time-based slots.

- Full-day admissions: Only 1 timeslot is created per day
- Admissoin with time-based slots: You have the option to create multiple timeslots for each day. This is particularly useful if there are multiple admissions per day.
Online sale closes
You can choose when the online sale should close.An already closed slot can no longer be booked in the online shop.The default value is 1 hour prior to commencement, or until midnight on the respective day in the case of full-day admissions. If you select days, you can also specify the precise time.
On the on-site sales screen, these slots are displayed with a symbol (crossed out eye) and a corresponding notification. Although these slots are no longer available for online sale, you can still sell them on-site until the admission commences. 
Calendar
Please note that changes to an existing admission are immediately saved and published.
Scroll on down and click on the blue Edit calendar button.

Adding categories
Do you have different ticket prices for certain times (e.g. mornings or at the weekend)? Then we recommend that you create various categories in the calendar. If the same prices apply for all timeslots, then you can ignore this function.
In the top right-hand corner, click on the blue Categories button.

Create a dedicated category for each ticket price. To do so, click on the blue New category button. Once you have created all categories, click on Save. 
Adding slots
Click on the blue Slots -> Add slots button.
The window shown below opens. 
You can create multiple slots at once. Specify from when, and until when you want to add the slots.
Time
The precise time of the slots.
Select the week days on which the slots are to be added.
The allotment (number of available seats) for each slot.
When creating a new calendar, a default allotment is created. You can find our how to set up multiple allotments for each slot here.
Category
Select the correct category for each slot.
Finally, click on the Add slots button.You receive an acknowledgement stating the number of slots created.

Editing slots
Editing 1 slot

Editing multiple slots
Oftentimes multiple slots must be changed rather than just one. To adjust several slots, click on the blue Slots -> Edit slots button.

Specify the date, time and weekday for the slots that you wish to edit. Under Time, either a specific time or all slots for a day can be selected.
Now specify the new values in the area at the bottom (allotment, category, or time). When adjusting a allotment, please take into account the number of tickets already issued.

Deleting slots
Deleting 1 slot
Deleting multiple slots
If you want to delete several slots at once, click on the blue Slots -> Delete slots button.

Specify the date, the time and the weekdays that you want to delete, and then click on the Delete slots button.

When deleting multiple slots, e-guma does not check whether tickets have already been issued. Before deleting, please check whether tickets have already been issued for the slots in question.
Restoring slots
When deleting slots, these are not deleted from the database, but rather merely marked as deleted. If slots have been deleted accidentally, click on the blue
Slots -> Restore slots button.
The times at which slots have been deleted are displayed.The most recent deletions are displayed at the top.

Select the appropriate date and click on Restore slots.
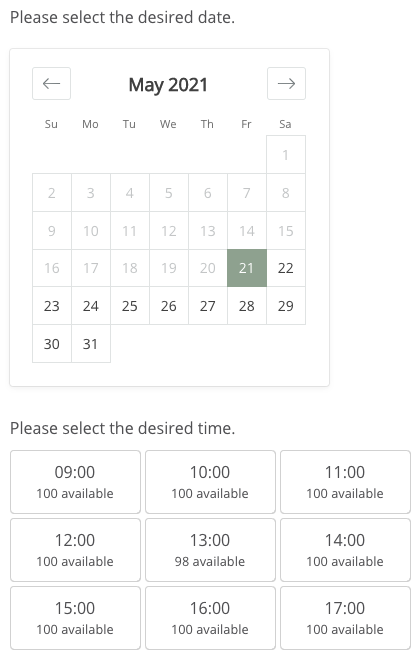
Show availability in the online shop

Maximum number of orders per slot
Activate this function if you want to limit the number of orders possible per slot (day or time).This function is for example particularly useful on occasions when only one group can make a booking per slot. The saved allotment also specifies the maximum number of people for whom a booking can be made.

Ticket types
Create one or more ticket types as described here. Enter the corresponding Categories of the calendar in the Calendar category field. One or more calendar categories can be assigned to a ticket variant.

Early bird ticket types
For full-day admissions, you have the option to offer discounted prices the earlier the ticket is purchased. For each tier (number of days before the event and corresponding price), create a separate ticket variant.
It is important that the name of the ticket variant remains the same across all tiers, e.g., "Adult". The number of days is controlled via a tag, e.g., Early-bird-7-days. Add the corresponding tag to the Early Bird ticket variants. No tag needs to be added to the regular price ticket variant. The order of the ticket variants does not matter.

In the shop, e-guma determines the cheapest ticket variant based on the selected slot and only displays that option. This mechanism works in both the shop and the back office. Here you will find an example of this.

Copying an admission
Would you like to create the same admission again? This is possible using the blue Copy button: when copying, you can specify whether the new admission should also occupy the same calendar slots. Settings such as ticket types, descriptions etc. are automatically applied.